Build an Obsidian Blog with Astro and Cloudflare
How to Build a Blog with Obsidian and Astro: The Advanced Terminal and Cloudflare Method
For writers and developers, the holy grail of blogging is a setup that combines the frictionless writing experience of a local Markdown editor with the blazing-fast performance of a modern static site.
This guide walks you through the advanced, terminal-first method of building your personal blog using Obsidian as your database (via the Astro Modular theme) and publishing it to Cloudflare Pages via GitHub. This is the method highlighted in David V. Kimball’s full course, optimized for speed, control, and zero hosting costs.
List of Contents
- 1. Prerequisites and Local Preparation
- 2. Installing Astro Modular via Terminal
- 3. Opening and Configuring Obsidian Vault
- 4. Setting up GitHub Version Control
- 5. Deploying to Cloudflare Pages
- 6. Setting up a Custom Domain & Cloudflare DNS
- 7. Syncing & Publishing Content
Jump to a Section
| No. | Step | Link |
|---|---|---|
| 1 | Prerequisites & Preparation | Jump to Section |
| 2 | Terminal Installation | Jump to Section |
| 3 | Obsidian Vault Setup | Jump to Section |
| 4 | GitHub Integration | Jump to Section |
| 5 | Cloudflare Pages Deployment | Jump to Section |
| 6 | Custom Domain Config | Jump to Section |
| 7 | Publishing Workflow | Jump to Section |
1. Prerequisites and Local Preparation
Before running terminal commands, ensure your development environment has the necessary tooling installed:
- Node.js: The framework relies on Node.js. Version 24.x (LTS) or higher is recommended. You can verify your installation by running
node -vin your terminal. - pnpm: A fast, disk space-efficient package manager. Install it globally via npm if you do not have it:
npm install -g pnpm - Git: Crucial for version control and deploying to Cloudflare. Verify with
git --version. - Obsidian: The editor you will use to write, edit, and manage your blog posts.
- GitHub Account: Required to host your repository and trigger the Cloudflare Pages CI/CD pipeline.
2. Installing Astro Modular via Terminal
The advanced setup path uses the command-line interface (CLI) to pull down the Astro Modular template and automatically bootstrap dependencies.
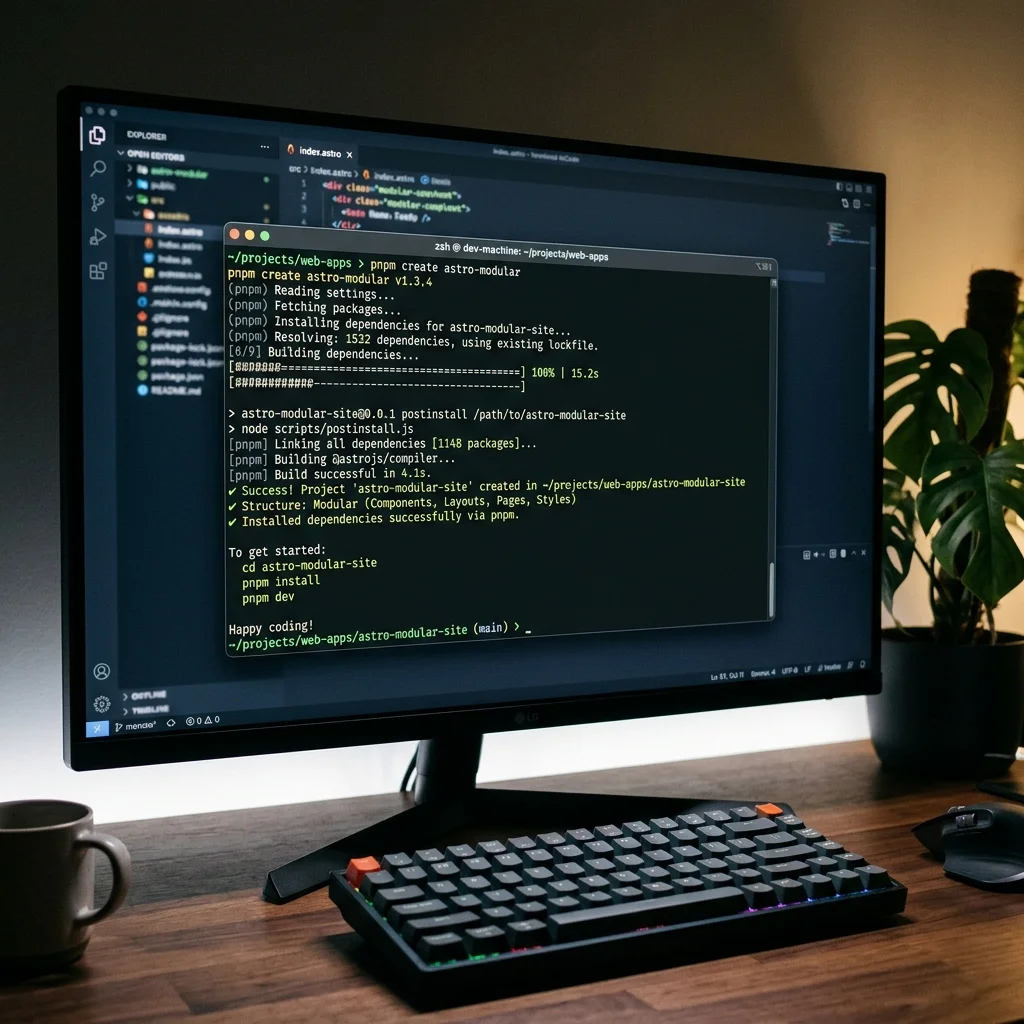
Step 2.1: Run the Astro Modular Creator
Open your terminal (PowerShell, Command Prompt, or Terminal app) and navigate to the directory where you want to store your project. Run the following command:
pnpm create astro-modular my-blogThis script will prompt you for a project folder name (e.g., my-blog), download the latest release, clear developer-only files, and install all necessary npm packages.
Step 2.2: Navigate to Project and Run Local Dev Server
Change into your new project directory:
cd my-blogStart the Astro development server to verify the template compiles and runs locally:
pnpm devThe terminal will log that your dev server is active, typically running at http://localhost:5000/. Open this URL in your web browser. You should see the homepage of your new Astro Modular blog.
3. Opening and Configuring Obsidian Vault
Astro Modular is built upon Vault CMS, meaning the content directory of your site is actually a valid Obsidian Vault.
Step 3.1: Open Vault in Obsidian
- Open the Obsidian application.
- Click Open folder as vault (or “Open” next to “Open folder as vault”).
- Navigate to your project folder (
my-blog) and select thesrc/content/directory. Open this folder.
Step 3.2: Trust and Enable Community Plugins
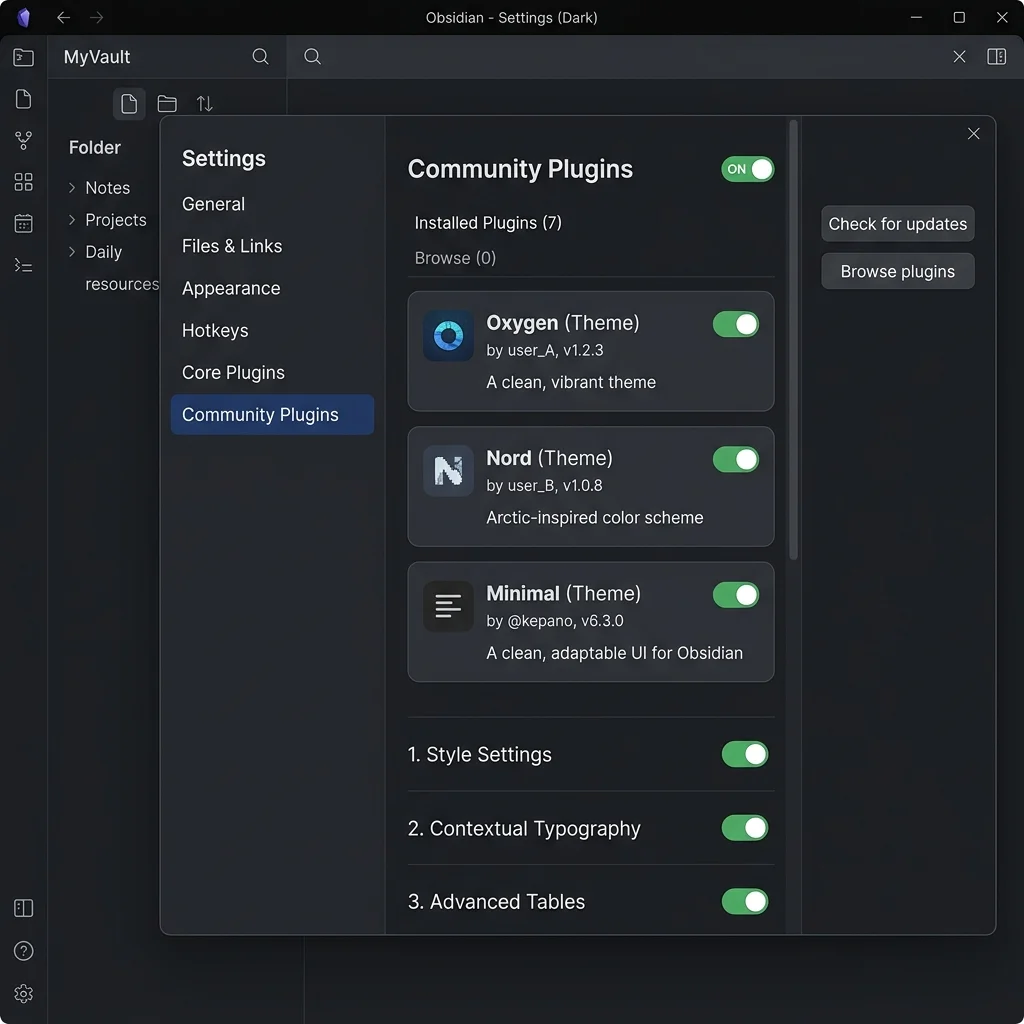
Obsidian will warn you about Safe Mode. Because the Astro Modular template comes preconfigured with plugins that connect your editor to your website settings, click Trust author and enable plugins.
The vault is equipped with several vital plugins:
- Astro Modular Settings: Launches a setup wizard at startup. It lets you customize your blog theme (e.g., Oxygen, Minimal, Nord) and features, writing these directly to the site’s
src/config.tsoutside the vault. - Astro Composer: Automates post creation, handles kebab-case slug renaming, and configures templates.
- Git: Pinned to your status bar for syncing with GitHub.
- Home Base: Launches a custom
.basedashboard representing your content in grid views.
4. Setting up GitHub Version Control
To connect your local vault to Cloudflare Pages, your repository must be hosted on GitHub.
Step 4.1: Initialize Git and Create Local Commit
If Git was not initialized by the creator script, initialize it and commit your project files:
git init
git add .
git commit -m "Initial commit of Astro Modular Blog"
Step 4.2: Link to GitHub
- Go to GitHub and click New Repository.
- Name your repository (e.g.,
my-blog) and leave it public or private. Do not initialize it with a README,.gitignore, or License (as they already exist in your folder). - Copy the remote repository URL and run the following commands in your terminal:
git remote add origin https://github.com/your-username/your-repo-name.git
git branch -M main
git push -u origin main
5. Deploying to Cloudflare Pages
Cloudflare Pages provides global, lightning-fast static hosting connected directly to Git.
Step 5.1: Configure Astro Modular Platform
Before building, update your deployment platform setting. Open src/config.ts (either in an IDE or using the “Edit Astro Config” command in Obsidian) and configure the deployment block:
deployment: {
  platform: "cloudflare-workers",
}
Note: The platform value "cloudflare-workers" instructs Astro Modular to generate Cloudflare-compatible redirect files (_redirects) during the build process.
Step 5.2: Create a Cloudflare Pages Project
- Log in to the Cloudflare Dashboard.
- In the left sidebar, click Workers & Pages.
- Click Create Application -> Select the Pages tab -> Click Connect to Git.
- Log in with your GitHub credentials and select your repository (
my-blog). Click Begin setup.
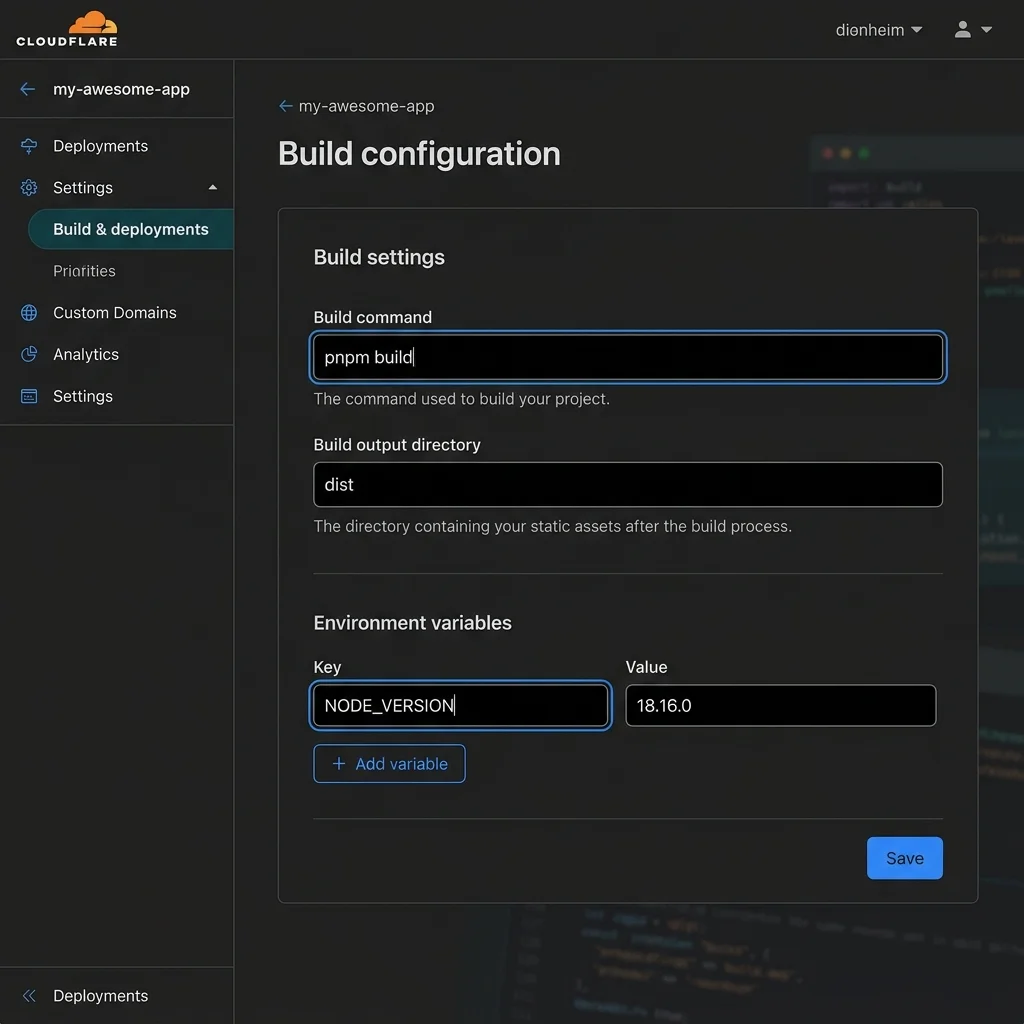
Step 5.3: Set Build Settings
Configure the build step details:
- Project Name: Set your subdomain (e.g.,
heybear-hubwill yieldheybear-hub.pages.dev). - Production Branch:
main - Framework Preset: None (or Astro if available, but “None” works best for custom commands).
- Build Command:
pnpm build - Build Output Directory:
dist
Step 5.4: Set Node.js Environment Variable
Astro requires Node.js v18.14.1 or higher to build. You must tell Cloudflare Pages which version to use:
- Scroll down to Environment Variables (Advanced).
- Add a new variable:
- Variable Name:
NODE_VERSION - Value:
24(or whatever matching LTS version you use).
- Variable Name:
- Click Save and Deploy.
Cloudflare will now clone your GitHub repository, install dependencies, optimize your images, compile pages, and launch your site live!
6. Setting up a Custom Domain & Cloudflare DNS
While Cloudflare provides a free *.pages.dev subdomain, linking a custom domain gives your blog a professional presence.
Step 6.1: Add Domain to Pages Project
- Within your Pages project dashboard on Cloudflare, click the Custom domains tab.
- Click Set up a custom domain.
- Type in your registered domain (e.g.,
yourdomain.comorblog.yourdomain.com) and click Continue.
Step 6.2: Configure DNS Records
If your domain’s nameservers are managed by Cloudflare, it will automatically offer to configure the DNS CNAME records for you. Click Activate domain.
If your domain is registered elsewhere (e.g., Namecheap, GoDaddy):
- Log in to your domain registrar’s DNS management panel.
- Create a new CNAME record pointing your domain (or subdomain) to your Pages URL (e.g.,
my-blog.pages.dev). - Save the record and wait for DNS propagation (usually taking between 5 minutes and a few hours).
7. Syncing & Publishing Content
Now that your pipeline is configured, publishing new content requires no coding or manual terminal commands.
The Publishing Loop:
- Write: Open Obsidian, create a new post in the
postsfolder, and write your thoughts. - Commit & Sync: Use the Obsidian Git plugin by clicking the commit-and-sync button in your Obsidian status bar (or press
Ctrl + Shift + S). - Deploy: The plugin commits your new notes and pushes them to GitHub. GitHub triggers Cloudflare Pages to rebuild and deploy the updates, which takes under a minute.
Your blog is now successfully configured as a developer-grade static site with a user-friendly Obsidian CMS back-end!